Supported Headstand
Also known as: Sirsasana
Track this exercise in SmartWorkout
Log sets, weights and progress for free, with no workout limits.


Description
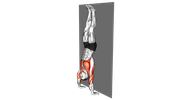
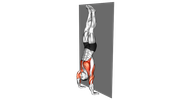
Kneel facing a wall or use a spotter. Interlace your fingers, place your forearms on the floor shoulder-width apart, and rest the crown of your head lightly between your hands. Lift your hips, walk your feet closer, then draw your knees toward your chest and slowly extend your legs overhead. Press firmly through your forearms and shoulders to keep weight off the neck, maintaining a long, controlled body line. Lower with control and rest before repeating. Avoid if you have neck, shoulder, eye-pressure, or blood-pressure concerns.
How to Perform
- Practice near a wall with a clear, padded surface, and avoid this exercise if you have neck, shoulder, eye-pressure, blood-pressure, or balance concerns unless cleared by a qualified healthcare professional.
- Kneel facing the wall and place your forearms on the floor, interlacing your fingers to create a stable cup for the back of your head.
- Set your elbows about shoulder-width apart; keep them from sliding outward by checking that each hand can lightly hold the opposite elbow before interlacing your fingers again.
- Place the crown of your head gently on the floor with the back of your head supported by your interlaced hands, keeping pressure light through the neck.
- Tuck your toes, lift your knees, and walk your feet toward your torso until your hips are stacked as closely as possible over your shoulders.
- Press firmly through your forearms and shoulders, drawing your shoulder blades away from your ears so most of the load is supported by your upper body rather than your head and neck.
- Bend one knee and draw it toward your chest, then bring the other knee in to balance in a compact tuck position without kicking off the floor.
- When stable, slowly extend both legs upward until your body forms a straight line, keeping your core engaged, legs together, and gaze neutral.
- Hold the position while breathing steadily and maintaining active pressure through your forearms; stop immediately if you feel neck pain, tingling, dizziness, or loss of control.
- To exit, bend both knees into the tuck position, lower one foot and then the other to the floor with control, and rest briefly in Child’s Pose before standing.
What Muscles Work
Primary Muscle:
Secondary Muscles:
Tips
- Warm up the shoulders, upper back, wrists, and neck before practicing, and only attempt the full position if you can comfortably hold a stable dolphin pose.
- Set up on a firm, non-slip surface with your forearms shoulder-width apart and elbows directly under the shoulders; interlace the fingers to create a stable cup for the back of the head.
- Place the crown of the head lightly on the floor with the back of the head supported by your clasped hands; avoid putting the forehead or the back of the skull directly into the floor.
- Press strongly through the forearms and lift the shoulders away from the ears so the neck stays long and does not carry most of your body weight.
- Walk the feet in gradually until the hips stack over the shoulders, then draw the knees toward the chest with control before extending the legs upward.
- Keep the ribs gently drawn in, engage the abdominals and glutes, and aim to stack ankles, hips, and shoulders in one vertical line rather than arching the lower back.
- Use a wall for initial practice, but avoid kicking forcefully into it; build balance by lifting one knee at a time and moving slowly.
- Breathe smoothly and keep the jaw, face, and neck relaxed; come down immediately if you feel neck pain, pressure, dizziness, tingling, or loss of control.
- Exit with the same control used to enter: bend the knees, bring them toward the chest, lower the feet quietly, and rest in Child’s Pose for several breaths.
- Avoid headstands if you have neck or shoulder injuries, uncontrolled high blood pressure, glaucoma or other eye-pressure conditions, recent head injury, or if a qualified professional has advised against inversions.
- Practice with a qualified instructor or spotter if you are new to inversions, and prioritize a short, well-aligned hold over trying to stay upside down for a long time.
Common Mistakes
- Placing too much weight on the head instead of distributing it through the forearms and shoulders
- Allowing the elbows to flare wide, reducing the stability of the forearm base
- Shrugging the shoulders or collapsing through the upper back instead of actively pressing through the forearms
- Using a loose or unstable hand clasp that lets the head shift during the hold
- Placing the crown of the head too far forward or backward rather than centered within the forearm base
- Kicking up aggressively instead of lifting the legs with controlled core engagement
- Arching the lower back and letting the ribs flare instead of stacking the hips over the shoulders
- Keeping the hips behind the shoulders, creating a banana-shaped position rather than a vertical line
- Bending the knees or separating the legs unintentionally during the hold
- Letting the legs drift forward or backward instead of making small controlled balance adjustments
- Holding the breath and losing trunk tension
- Dropping out of the position without control instead of lowering the legs slowly
Recommended Exercises
Explore exercises related to Supported Headstand for shoulders training and similar movement patterns.
Choose a workout plan or create your own - for free
Ready-made plans for every goal, a free plan creator, hundreds of exercises and an advanced workout journal - all in SmartWorkout.